How to choose the right needle to sew or free motion with

Note: this needs editing

Your goal is to choose a needle that will make a hole for long enough time and also smooth enough that the thread will slide smoothly through the hole in the fabric. The hole shouldn’t be too big to appear permanent and shouldn’t be too small to cause problems, or compromise the strength of the fabric. The needle shouldn’t damage the fabric or the thread.

Here is a sequence of questions to ask yourself when choosing a needle.

  1. What kind of fabric? Woven or stretchy?
  2. What thread am I going to use?
  3. What is the fabric like in detail?
  4. What kind of sewing am I doing?

The Nitty Gritty Answers

Questions 1 and 2 is where you start. Questions 3 and 4 will fine tune to arrive at the best needle choice.

1. The kind of fabric will determine if you need a sharp or rounded needle point. Is the fabric woven or stretchy or knitted?

A. Woven? Is it tightly or loosely woven?

Tight or dense? choose a sharply pointed needle such as topstitch, microtex, universal because You want the needle to penetrate and damage as few fibers as possible. The fibers in a dense weave cannot move out of the way. So, sharper is better for this type of fabric.

Loose woven needs a ball or semi ball point, Because you want to push the fibers aside when it moves through the fabric.

Tight weaves don’t mix well with ball or blunt dull needles. The force of a blunt or ball point striking a dense weave will tear through the fibers and actually rip and pull them in the process, resulting in uneven, irregular holes and damage to the fabric. (Blunt can be a worn out old needle too.)

B. Stretchy, elastic or knitted fabric? All these types of fabric are loose. Choose a ballpoint needle , jersey or stretch needle . You want the needle to move through the fabric pushing away the elastic fibers not cutting though them.

2. What thread are you wanting to use? This will help determine approximately what eyehole type and size to use. The lighter or thinner the thread that is being sewn, the smaller the needle should be. You don’t want a big fat thick needle leaving a big hole behind. Conversely, you don’t want a hole that is too small and the thread runs and wears out , maybe shredding or breaking as it passes through the hole because it’s rubbing on the fabric.

2A. Is it heavy or lightweight thread?

In general, these size needles go with these size threads.

120/19 – some kinds of industrial threads

110/18 – 12 wt thread

100/16 – 30 wt thread , maybe 12 wt

90/14 – 40 wt thread

80/12 – 50 wt thread

75/11 – 50 wt thread

60/10 – 60 wt thread

65/9 – 100 wt thread

2. B. Is your thread strong or weak?

cotton or trilobal polyester? Universal, denim, topstitch or microtex

Weak like an embroidery rayon type of thread? Then choose an embroidery needle or needle with a deeper groove like microtex. The deeper groove will protect the thread from rubbing on the fabric. Don’t have an embroidery needle try go up one size as if the thread were heavier than it is.

2.c is your thread metallic? Use a metallic or microtex needle. Also if having problem lubricate the thread on the spool w thread ease or sewing machine oil. some sewing machines have an add on for lubricating your thread after it comes off the spool. Metallic thread wear out needles faster. I suggest a titanium coated needle especially when sewing with metallic thread.

3. What is the fabric like that you will sew on? In general, the lighter or thinner the fabric that is being sewn, the smaller the needle should be.

Is it tightly woven or very dense or very heavy? Go up a needle size OR choose a needle type with a larger groove or eye hole such as a top stitch or microtex or embroidery.

4. What type of sewing are you doing? Embroidery with its usually weaker thread and lots of densely packed stitches is helped by using an embroidery needle wish has a deep groove to protect the thread.

Are you sewing a lot of layers? Or just piecing two layers? Lots of layers might need a size up.

5. How old is the needle you are using?

A general rule of thumb is to change a needle every 8 hours or at the beginning of every project. BUT! The fabric will tell you when to change the needle by making a “pok-pok” sound. As the wear gets worse, the sound will become louder. I find on my long arm, a needle starts making the pok pok sound at about two or three hours. The sound occurs when fibers are being punched and torn.

Microtex needles make beautiful stitches but because they have very pointed long “noses” that are more easily damaged they must be changed more often. Note: this is my favorite needle type. I use the titanium coated ones in order to get more life from them.

Other needle options:

An interesting needle to try for free motion is the schmetz spring needle. It replaces the need for a specialized free motion foot. And so clears the area to more easily see your work. It also come varieties for different types of fabric such as topstitch, ballpoint, stretch, denim, quilting.

Remember in the scheme of things needles are cheap! Change them often! Needles are specialized for different combinations of thread, fabric, and job. The wrong needle will cause shredding, breakage, and frustration.

Other questions

My thread spool says use a diff size needle… use what they recommend. Example Superior Thread microquilter says use a #14 or #16 needle. It is 100 wt thread and works great with those size needles! Normally 100 wt threads use a thinner needle. But Superior microquilter is super strong and is designed for using with the larger needle size. But, 100 wt silk thread on the other hand sews better for me with a thinner needle like a #10 or #9.

What do the needle numbers mean?

Needles usually are denoted by two numbers. The bigger number is the diameter of the needle in 1/100’s of a millimeter. The smaller number is an arbitrary U.S. notation. In general the smaller the number the thinner the needle.

If you use a #75/11 or #80/12 size needle for 50 weight thread, you should use a needle with a larger eye when sewing with a heavier thread. I recommend a size #90/14 when sewing with a 40 wt. thread and a #100/16 needle when sewing with a 30 wt or 12 wt. thread.

Is your thread shredding or skipping stitches?

First try a new needle, old needles can get burrs or sharp areas. Second, check your threading path (rethread), third, check your tension if you changed thread thickness, your tensions will be different. Also check the quilt top tension between the leader bars, too taite will cause this problem if on a longarm, fourth, try a new needle and go up one size. Check your needle plate for burrs.

Titanium Needles?

Yes!!! https://freeformquilts.com/2014/11/25/titanium-needles-are-not-too-expensive/

Best Longarm Side Clamps Ever!

After a Loooooong break, I’m longarming again. My first quilt since 2019 is on the machine.

Yesterday, I unwrapped some new side clamps that I purchased in 20-something because my red snapper clamps were worn out. And, I am amazed! I wish I’d had these in 2009. Best clamps EVER!

Bonus: they have magnets in them so they hold my little tools that get lost easily. Thank you Fredrick C Hill! You are the best!

You can find these side clamps on Fred’s Website at http://frederickchill.com/sales_longarmSideClamps.php

Why can I thread a needle on the first try so easy and sometimes the same needle seems so hard?

This question came up on one of my Facebook groups. The question was asked by a hand quilter. I had a serious WTF! moment when another quilter who also does a lot of needle work answered.

“Turn the needle over, the hole really is bigger on one side”

Guess what!?! It’s true. hand sewing needle holes are beveled on one side to make sewing easier.

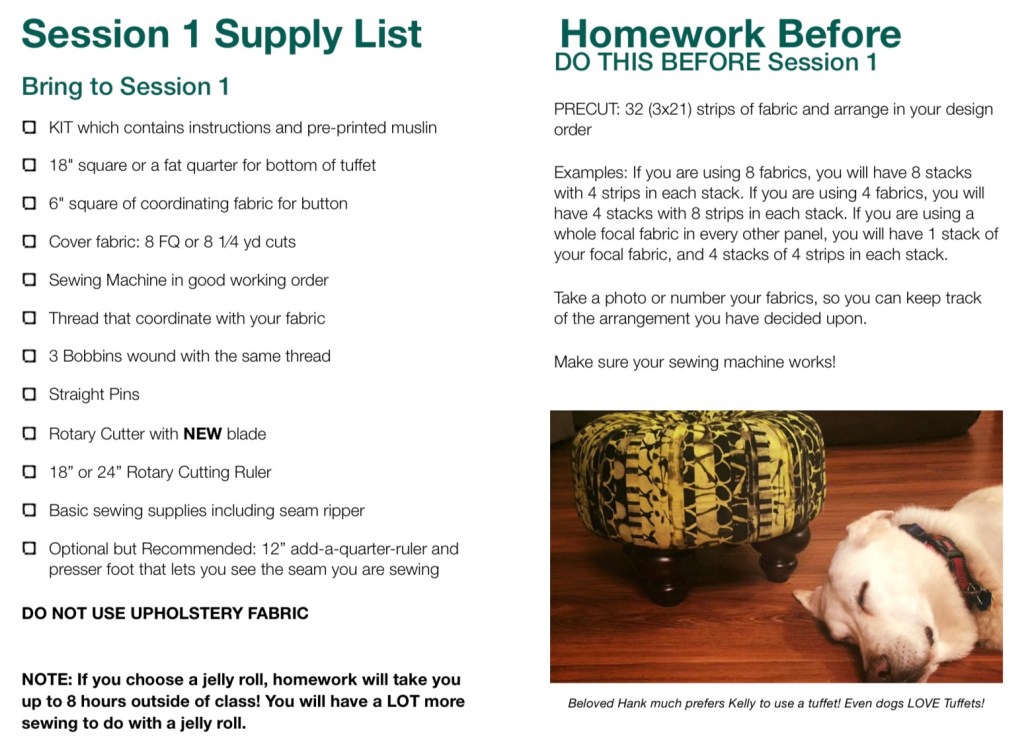
Tuffet Class Session 1

I”m excited to be teaching again. Covid 2020 really put a dent in my life style which included being around other artists and crafters. Holly Dee Quilts is offering my Tuffet Class again and April 10 is the first Session.

There is some homework and here is the Session 1 list of stuff to bring to class and stuff to get done class. We’ve got four hours and a lot to do. If you haven’t cut your strips yet… please do it tonight!

Tuffet Class Session 1 – Supplies and Homework!

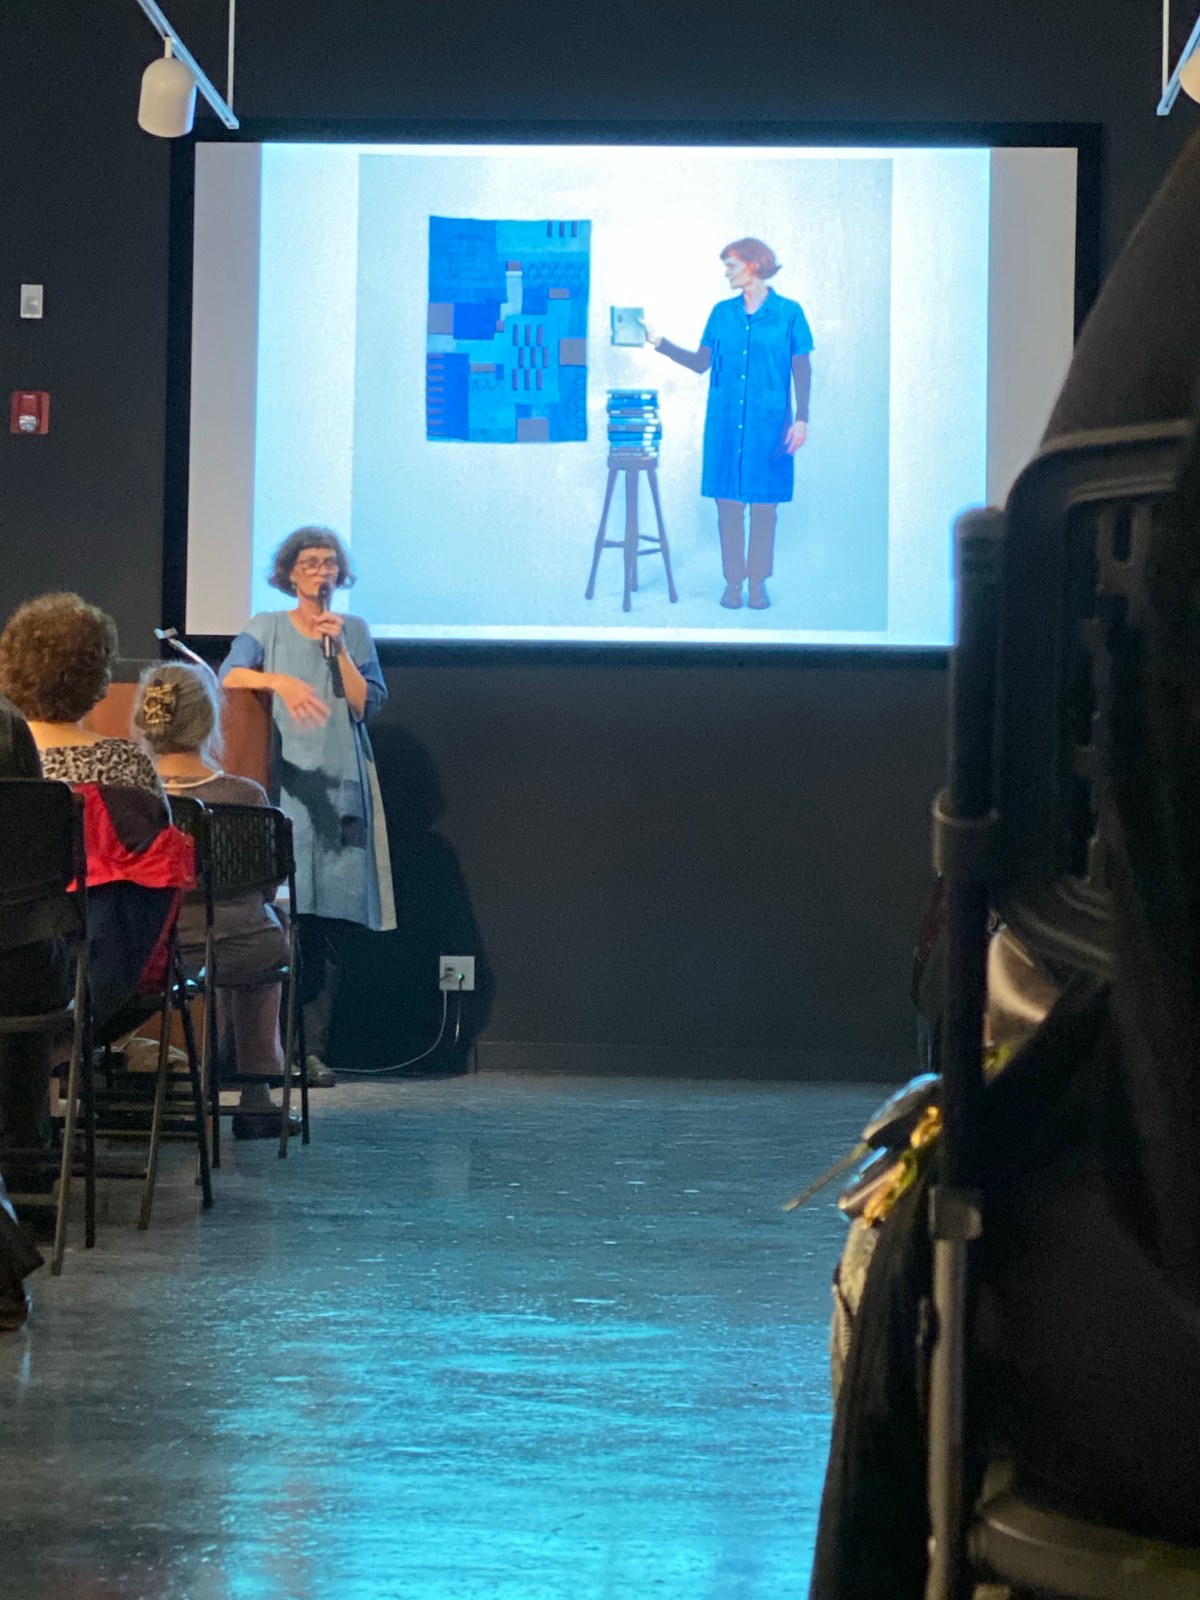
Jody Alexander is Influenced by Fiber Art

I Attended a wonderful and stimulating lecture about repair techniques as working wearable useful art across cultures. The lecturer, Jody Alexander, was amazing. The strong emotion I have came from her media. She tore fabric out of antique and delisted library books, from the covers and linings. I rever books. Fahrenheit 451 was one of the most terrifying horror books I’ve ever read. Book burning is one of the most disgusting, horrifying, heinous rape of the mind acts in the world. The destruction of knowledge and ideas has been used since the beginning of history to destroy cultures and civilizations. Book burning far out weighs anything Stephen King or Dean Koontz have ever written. And her art is based upon the destruction of books. It hit me viscerally. When it came to her own work I found myself both in awe and horrified. Her work was amazing. And humorous as she makes art “books” from her books. Her media hit me in the gut. Sick fascination and great work.

Not all thread is equal

I have NOT written about thread as in brands, twists and weight and how it affects seam allowance in piecing. It does, so I’m writing about it now.

I have to write about this.. I really do! I’ve written previously about how you choose your needle based upon the fabric and then you choose your thread. I’ve written about thread weight and how it looks and how it affects tension in the longarm (and the regular sewing machine. I have NOT written about thread as in brands, twists and weight and how it affects seam allowance in piecing.

THREAD MATTERS AND AFFECTS piecing big time!

Also some thread is linty and some wears your needle out faster.

So far, I have found using the three biggies (as in popular brands) in the quilting world the following.

Some thread is lintier.

Lintier, I’m not sure lintier is even a word. But there it is, I don’t like to clean out my bobbin area every time I switch out a bobbin especially when I”m in a quilt piecing frenzy. I’ve found from the cleanest (top of the list) to the lintiest (bottom of the list):

  • Cleanest
  • Superior Masterpiece 100% cotton 50/3
  • Aurifil MAKO NE 50/2
  • Mettler 100% cotton 50/3
  • Coats and Clark
  • Lintiest

Thread isn’t the same thickness

Thread affects my quarter inch seams. I sew almost always with Superior Masterpiece 100% cotton 50/3, so my eyeball is trained to “see” the amount of fabric to the right of the needle to give me a quarter inch seam. When I use a different thread.. it always affects my seam. I am pretty sure it is because the thread takes up some space. So thicker thread needs to be sewn with a “scant-ier” quarter inch seam than my normal seam. Mettler, even though it is 50/3 (like Masterpiece), is a bit thicker than the Superior Masterpiece 50/3. I’ve learned that to get the same finished size of a block with Mettler I have to sew a scant quarter inch and with Superior a real quarter inch. Aurifil acts more like Superior thread than Mettler, yet it still in between the two other brands. No one sees your seam allowances so if you switch thread (or machines) sew a quick test to make sure your finished blocks are the same.

Thread takes up space on the bobbin

Yes, it should be obvious. But somehow I just didn’t think about it much. You can’t wind as long an amount of thick thread as you can thin thread. I’ve taken to using Superior Bottom Line in my bobbin for just this reason. It’s super strong and it’s THIN! Yipee, I don’t have to change bobbins as often. I don’t get caught in the middle of a long seam because I didn’t think to check if my bobbin is going to run out. Talking about the threads I’ve mentioned above, here is a list about how long my bobbin lasts when wound with each one.

  • Lasts longest
  • Superior Bottomline 100% polyester  60/2
  • Superior Masterpiece 100% cotton 50/3
  • Aurifil MAKO NE 50/2
  • Mettler 100% cotton 50/3
  • Lasts not very long (have to wind bobbin more often)

*I quit using Coats and Clark because it’s just too darn linty. So I don’t remember how it is in the bobbin, thus it isn’t on the list about bobbin changing frequency.

As to why each thread is a different thickness, I’ve posted about thread weight 50 vs 60 etc. Thread weight isn’t very accurate when comparing different brands of thread because there really isn’t a standard system. So in my examples above, at first glance, it doesn’t make sense that the Aurifil Mako NE 50/2 is thicker than the Superior Masterpiece 50/3. However the differences I’ve experienced seem to be the truth of it.

Superior has a great article about thread weight here. UNDERSTANDING THREAD WEIGHT

So why would I use the lintier thicker threads? I want the effect they create sometimes. Sometimes I need a specific color and the nearest shop doesn’t have the brand I want. Sometimes I just got a sample, or a free spool. Sometimes, I just try something new. I do a lot of couching on the surface and I buy a lot of different threads for that purpose and I might need a specific color that I don’t have in my preferred piecing brand.


Longarm Lesson – Backing Too Short

Stuck with a quilt back that is too short? This is how I solved the quilt backing too small but already mostly quilted on my longarm problem.

One late afternoon, the machine was humming along and everything was going really well. I’d already finished two charity quilts. Everything was perfect, I had enough backing provided in the quilt packages and I was racing through the third charity quilt I’d promised to do. Suddenly, disaster struck!

Oh NO!

Always measure your backing or you will be sorry.
Moral of this photo: Measure your backing even if a customer has always given you enough. Always measure!

Oh NO! NO! NO! NO! The quilt backing provided was too short! I literally slapped myself up side the head. How many times had I admonished new longarmers to measure everything provided before you even put a quilt on your machine?! How many times!?!

GEEZ! NOW WHAT DO I DO!?

I called my friend Carol and put on my thinking cap. After sitting and pondering together for a bit and after a refreshing glass of _______. (iced tea?) I had an epiphany. I could solve this without taking the quilt off the machine, without having to go through the agony of getting it straight again, without having to take the several hours it seemed this disaster would need.

The solution turned out to be hilarious and my friend Carol took a video. The simple solution was to take off just the bottom of the quilt and leave the top attached.

I had a tea cart that set a small sewing machine on and just sewed a strip onto the bottom of the backing. It was a quick and easy matter to just re-attach the bottom and quilt on. Watch how I did it.

Sayl Chair Makeover

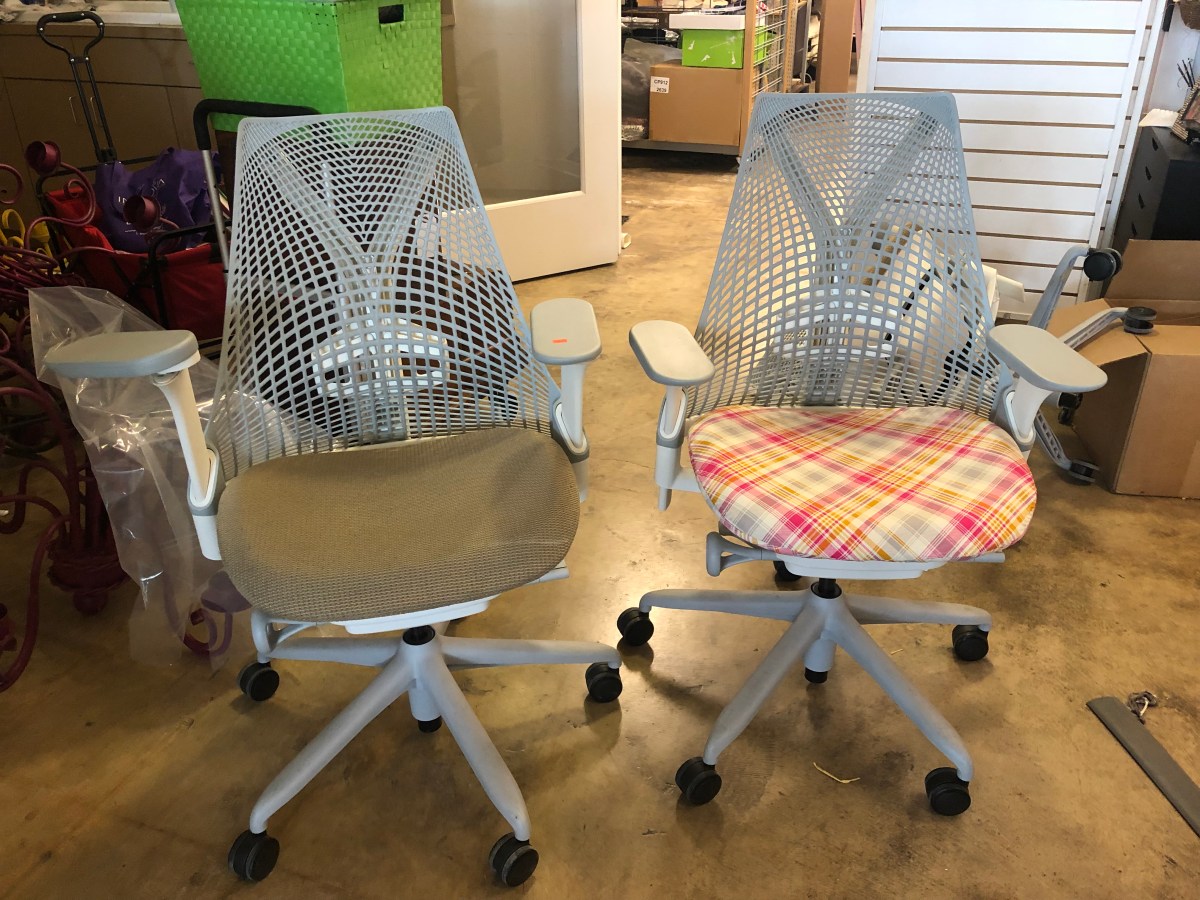
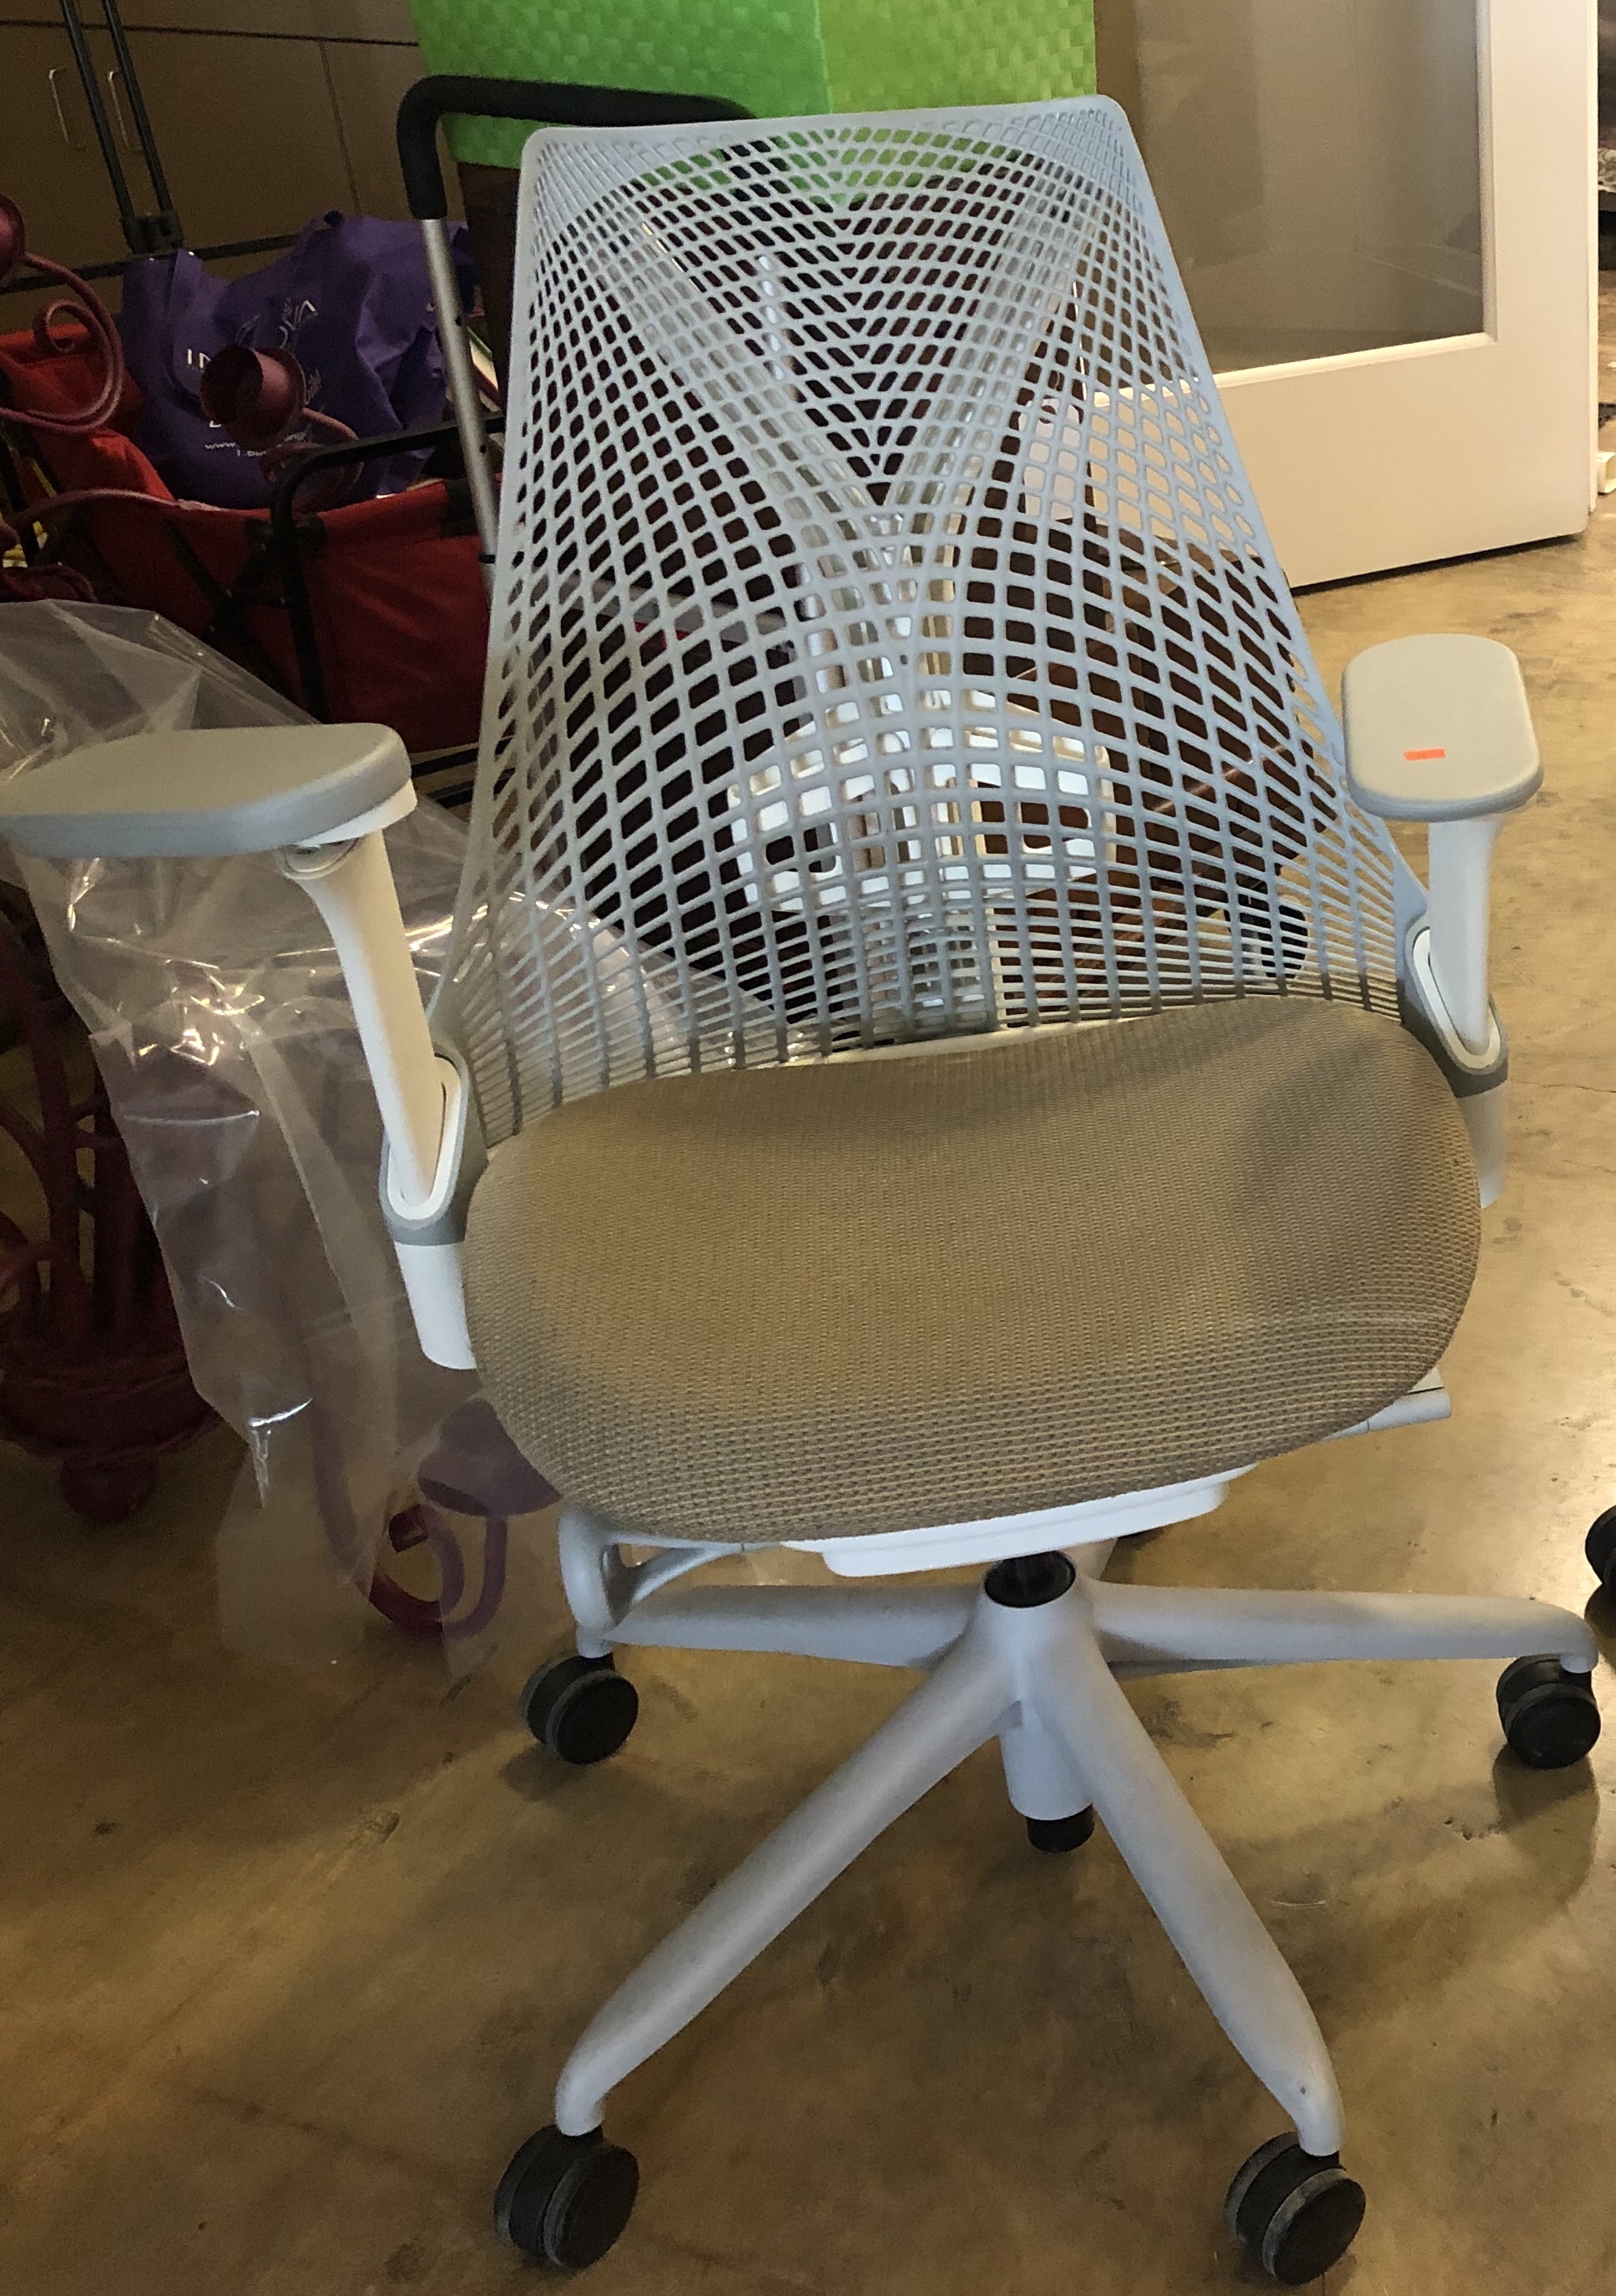
Sayl Before

Auctions can be a great place to find inexpensive sewing room luxuries. Take a look at this dirty drab brown worn chair.

These Herman Miller Sayl chairs are comfortable. The arms lower pretty far and will not get in my way when sewing. They have adjustable lumbar support and are curved just right to support my back and hips. Brand new these Sayl chairs including the tilt, height adjustment, lumbar support, and tilt lock brings about a $700 price tag.

First a brisk cleaning with soap and water. Second tightening loose arm rest bolts. Then, a little upholstery fabric in a cheery color perks up that boring chair.

My total cost (not including the tools) for this $700 chair was about $30. Score!

Sayl After

What is a guild Bee Keeper and Queen Bee

In the Texas Tea Stitchers I was nominated to be the Bee Keeper. Well, actually I was asked to be the Bee Coordinator but I thought that name was kinda boring, thus I became the Bee Keeper. My role is to keep track of our guild’s bees not to run them. As a Bee Keeper I am a kind of central repository or resource to find out about current bees. I will try to keep up with the folks who are in the guild bees. I hope they notify me when they start or end a bee. That sure would help.

As Bee Keeper I’m to keep track of the Queen or King Bees. Basically the ‘host’ of a bee. Some guilds call these people Momma or Poppa Bees. Generally, the Queen or Kins is the person generally in charge of the bee. Typically their responsibilities include:

  1. compiling all participants and making a list of email addresses, blogs, flickr names & mailing addresses
  2. setting up the schedule of months
  3. deciding on the “rules” of the bee
  4. facilitating communication between members (sending out emails, facebook posts, twitter tweets, phone calls, etc.)
  5. answering any questions from bee members
  6. organizing meet ups online or in person.

And if it is a monthly block echange type of bee or a round robin duties can also include:

  1. helping keep track of who’s month it is, and if fabrics have been sent out, and recieved.
  2. keeping track of blocks made/returned
  3. deciding how to address conflicts within the bee (fabrics or blocks lost in the mail, members dropping out, tardy blocks)

What to do with an old stool?

My Grammy’s wooden stool holds a lot of memories for me. I remember sitting inside the legs pretending it was a house, a fort, a jail, a treehouse and a dozen other wonderful hideouts. Grammy would pretend she couldn’t see me when I was under that wonderful old stool. I’m sure it was a great play toy for my cousins too. I remember the day I could no longer fit inside the legs of the stool. Grammy laughed and laughed until I started laughing too. We both had tears streaming from our eyes. Those were great times.

That stool moved with Grammy from home to home until she moved in with my parents. She gave me many of her things as I was a young adult and starting out on my own. The stool was one of them. And through my own moves and life changes I have kept that old stool. I’ve used it in all my kitchens just like Grammy did. At 50 plus years old, the stool finally started having issues with staying together. The hard oak wood is still sound, but the joints, just like my own, are a little loose and the legs and cross pieces would come out of their joints. Glueing helped temporarily but within months the joints would come apart again. I want to continue to use the stool. What to do?

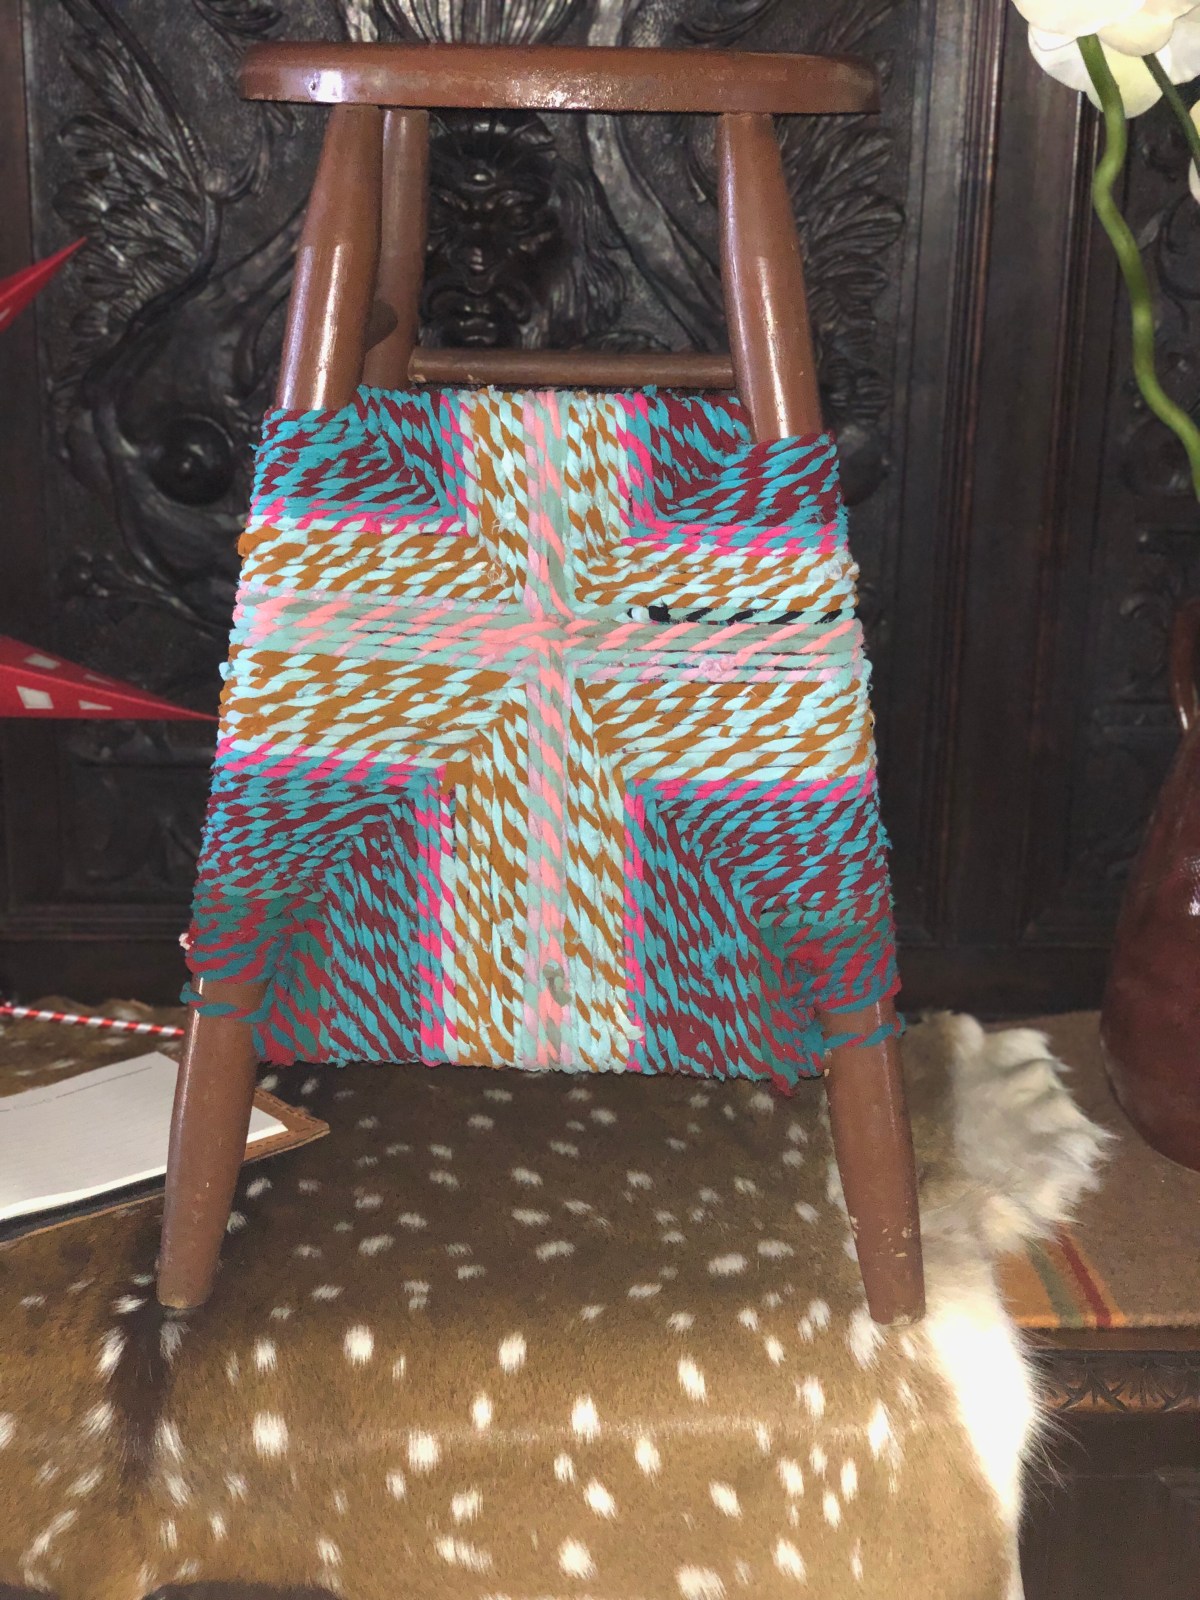
I took string and wound it around the base of the legs to keep pressure towards the center and the stool stayed together. So, like me, that old stool just needed a little help. The string wasn’t very pretty.

I was shopping at the Antiques Week in Texas and north of Roundtop I found a place selling upcycled useful things. I bought some giant balls. Long strips of cut up sari’s double plied and made into beautiful colorful balls of twine or yarn. The balls could be used for decor or for crafting. I wanted to use the twine for Christmas wrapping. I didn’t and the balls have been sitting in a kettle by my fireplace.

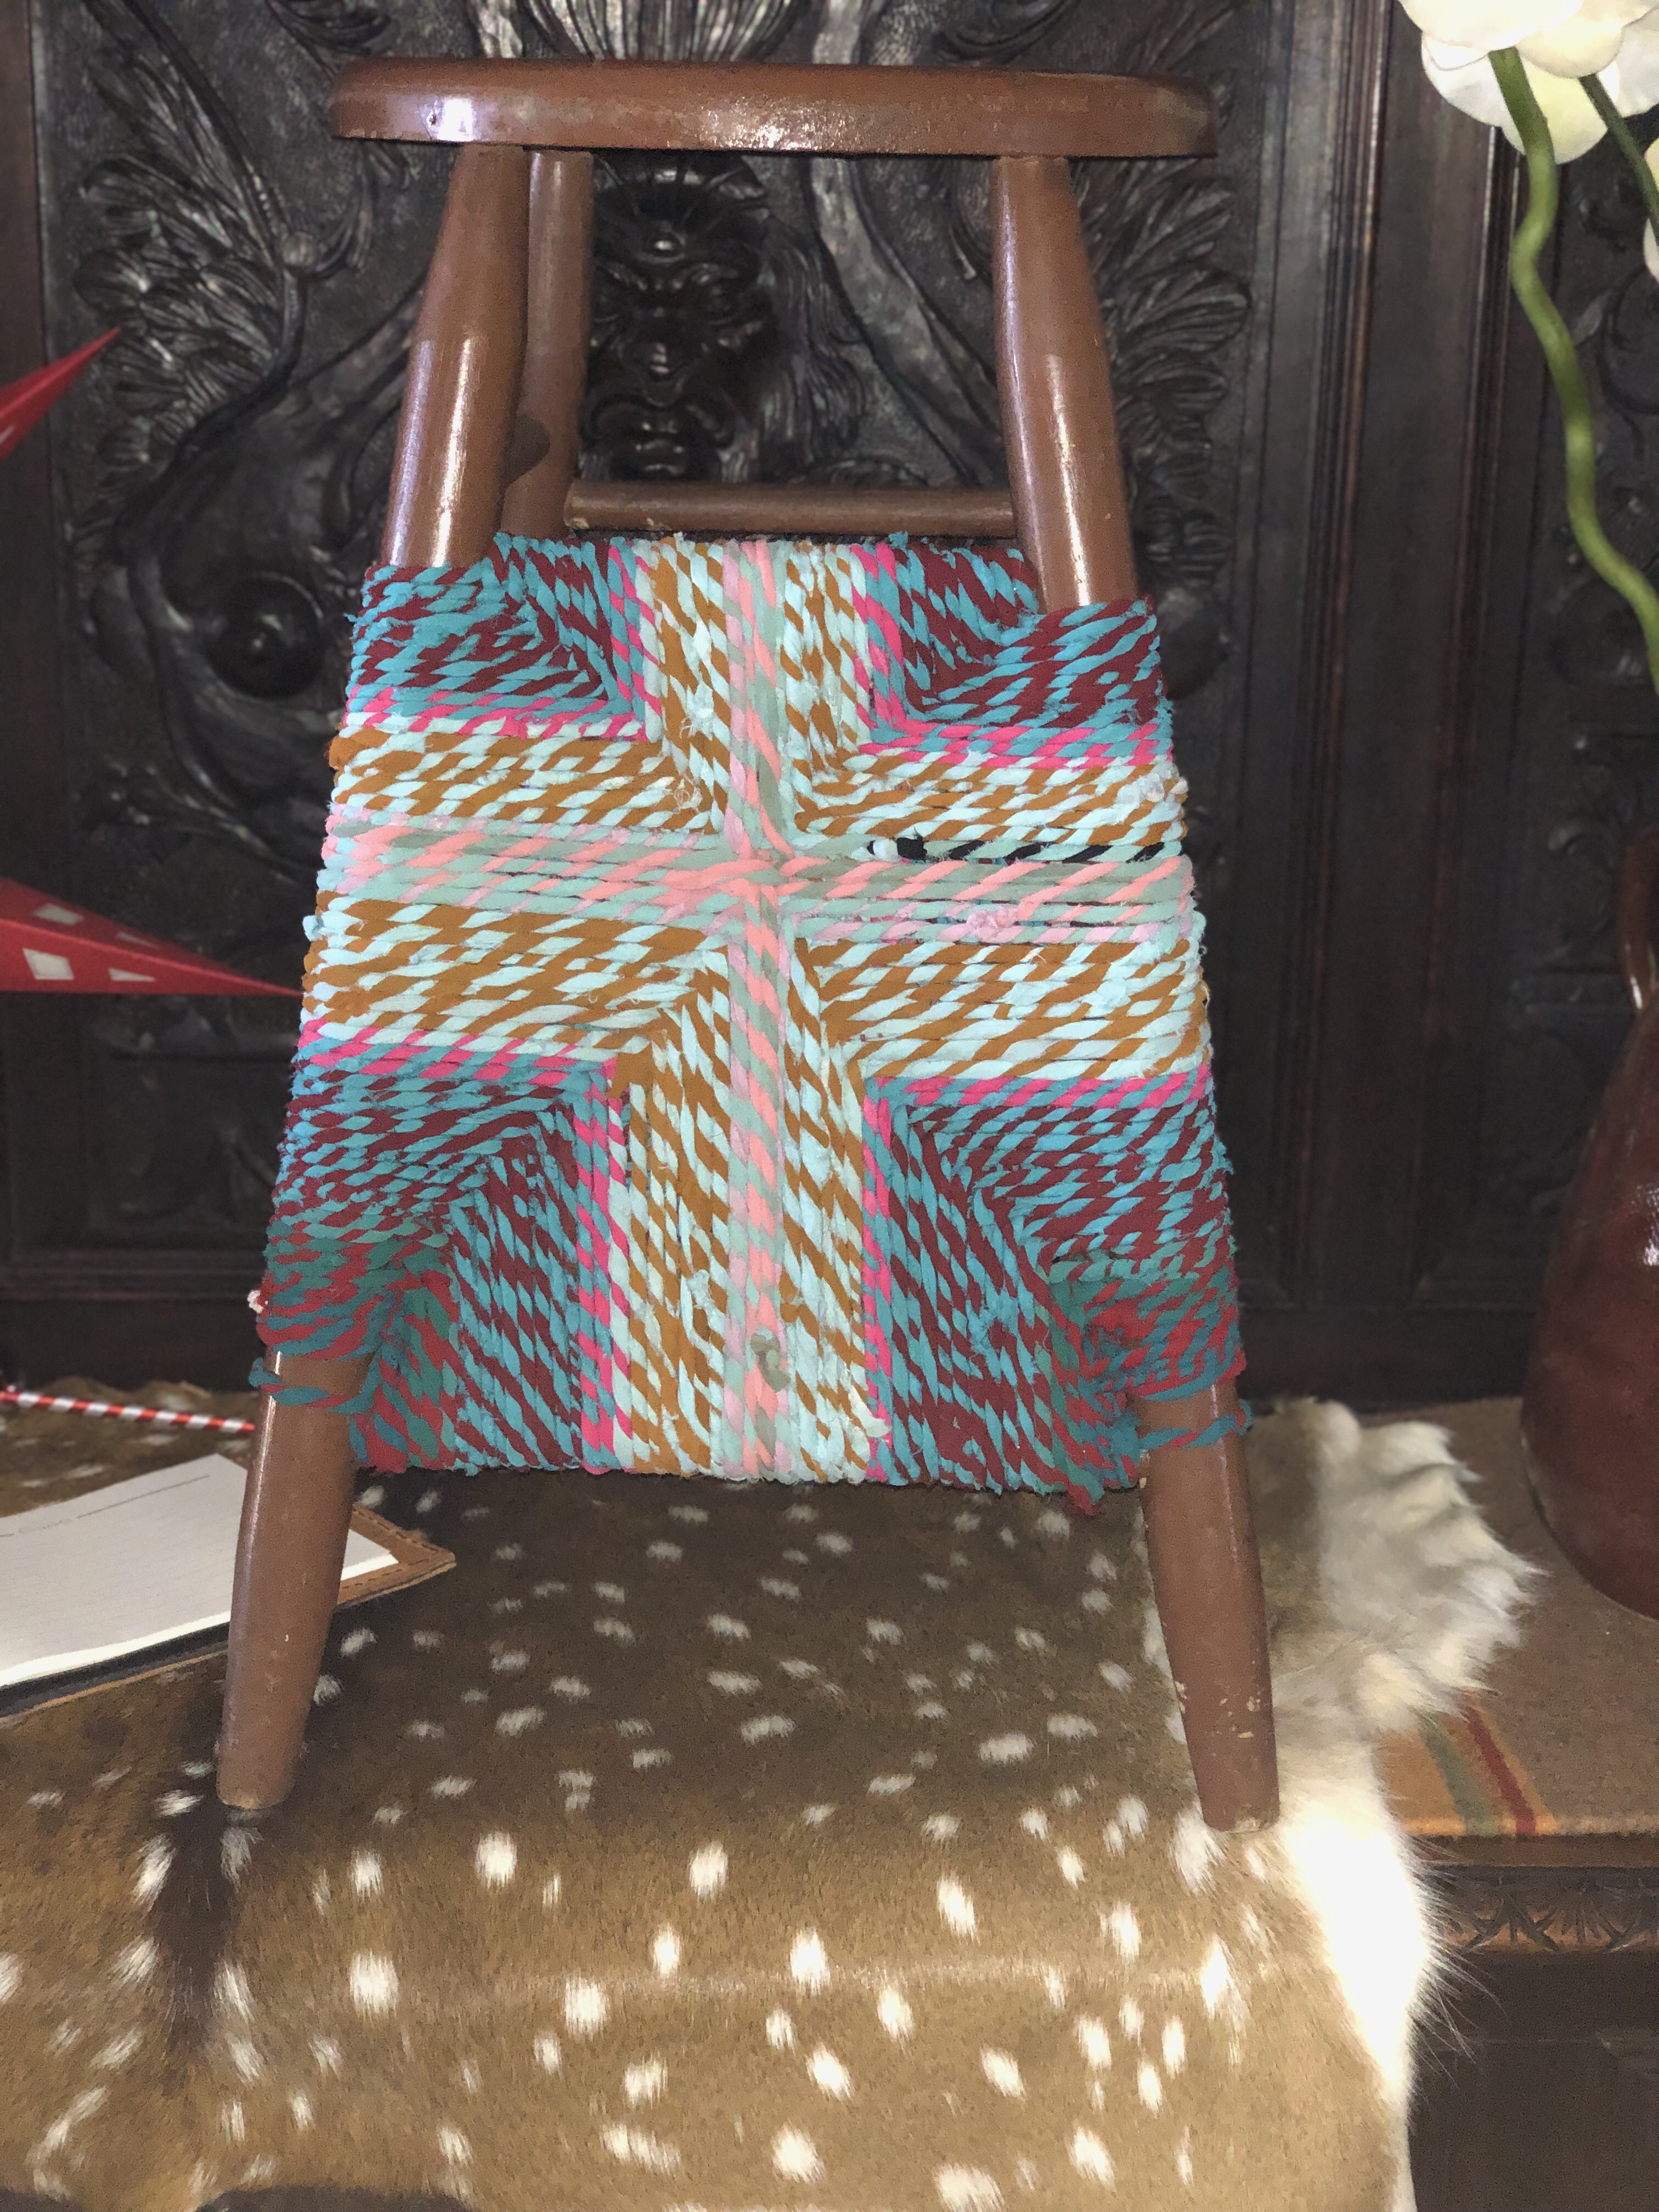
That sari cord! Yes, the perfect thing to use on the stool. After securing the base I spent three evenings trying to figure out how to wind and secure all four side at the same time. I needed to create inward pressure on the legs in order to keep the stool together.

I did figure out a way to do that, but felt that I couldn’t continue the pattern until the legs were completely covered. I did decide to go ahead and cover the legs completely. I also figured out how those rush seated chairs are woven in the process.

I’m not finished with the stool yet. But I have one side done. I think it looks I interesting and it will definitely give this chair another few decades of use.